×
- Hello
- Login or Register
- Quick Links
- Live Chat
- Track Order
- Parts Availability
- RMA
- Help Center
- Contact Us
- Shop for
- Mercedes-Benz Parts
My Garage
My Account
Cart
Genuine Mercedes-Benz C350 Brake Hose
Brake Line- Select Vehicle by Model
- Select Vehicle by VIN
Select Vehicle by Model
orMake
Model
Year
Select Vehicle by VIN
For the most accurate results, select vehicle by your VIN (Vehicle Identification Number).
4 Brake Hoses found


Mercedes-Benz C350 Brake Hose Part Number: 204-420-09-48-64
$19.52 MSRP: $27.00You Save: $7.48 (28%)Ships in 1-2 Business Days
Mercedes-Benz C350 Brake Hose Part Number: 204-420-10-48-64
$23.18 MSRP: $32.00You Save: $8.82 (28%)Ships in 1-2 Business Days

Mercedes-Benz C350 Brake Hose Part Number: 171-428-00-35-64
$28.06 MSRP: $38.50You Save: $10.44 (28%)Ships in 1-2 Business Days
Mercedes-Benz C350 Brake Hose Part Number: 203-428-03-35-64
$37.20 MSRP: $52.00You Save: $14.80 (29%)Ships in 1-2 Business Days
Mercedes-Benz C350 Brake Hose
Every OEM part goes through strict quality checks. The checks keep you safe and make Brake Hose tough. They keep performance the same as your original parts. If your Mercedes-Benz C350 needs OEM parts, visit our catalog. You will find extensive genuine Mercedes-Benz C350 parts. We offer a wide selection at competitive prices, and with clear fit details and simple guidance, choosing what you need is effortless. Each of our parts has a manufacturer's warranty. You will like our simple return policy. We pack and ship fast, and you get your order quickly. Shopping here feels easy and enjoyable.
Mercedes-Benz C350 Brake Hose Parts and Q&A
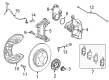
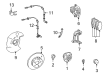
- Q: How to inspect and replace brake hoses and lines on Mercedes-Benz C350?A:About every six months, with the vehicle raised and securely supported on jackstands, inspect the rubber hoses connecting the steel brake lines to the front and rear brake assemblies for cracks, chafing, leaks, blisters, and other damage, as these are crucial components of the brake system. Use a light and mirror for a thorough check, and replace any damaged hose with a new one. For front brake hose replacement, loosen the wheel bolts, raise the vehicle, and remove the wheel. Note how the small tabs of the hose fitting sit in the frame bracket to prevent rotation. Support the hose fitting with an open-end wrench and unscrew the brake line fitting from the hose using a flarenut wrench to avoid rounding off the corners. At the caliper end, separate the hose fitting from the caliper with a flare nut wrench. Remove the grommet from the bracket at the lower end of the strut and pull the hose through the bracket. To install the new hose, place the grommet on it, thread it through the strut bracket, connect the hose fitting to the caliper, and tighten it. Ensure the hose isn't twisted when placing the fitting into the frame bracket, then connect the line fitting to the hose fitting and tighten securely. After bleeding the caliper, install the wheel and bolts, lower the vehicle, and tighten the bolts to the specified torque. For the rear brake hose, which has a fitting and bracket fastened to the rear frame, follow the same replacement steps as for the front. When replacing metal brake lines, use genuine steel brake lines and avoid copper tubing. Prefabricated brake lines with flared tube ends and installed fittings are available at auto parts stores. Ensure the new line is securely supported in brackets and has adequate clearance from moving or hot components. After installation, check the master cylinder fluid level, add fluid if necessary, bleed the brake system, and test the brakes carefully before driving.


