×
- Hello
- Login or Register
- Quick Links
- Live Chat
- Track Order
- Parts Availability
- RMA
- Help Center
- Contact Us
- Shop for
- Mercedes-Benz Parts
My Garage
My Account
Cart
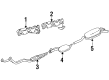
Genuine Mercedes-Benz 190E Exhaust Manifold
Engine Exhaust Manifold- Select Vehicle by Model
- Select Vehicle by VIN
Select Vehicle by Model
orMake
Model
Year
Select Vehicle by VIN
For the most accurate results, select vehicle by your VIN (Vehicle Identification Number).
6 Exhaust Manifolds found

Mercedes-Benz 190E Exhaust Manifold Part Number: 103-140-48-14
$120.00 MSRP: $167.00You Save: $47.00 (29%)Ships in 1-2 Business DaysMercedes-Benz 190E Exhaust Manifold Part Number: 103-140-37-14
$820.93 MSRP: $1150.00You Save: $329.07 (29%)Ships in 1-2 Business DaysMercedes-Benz 190E Manifold Part Number: 102-140-11-09
$900.00 MSRP: $1250.00You Save: $350.00 (28%)Ships in 1-2 Business DaysMercedes-Benz 190E Exhaust Manifold Part Number: 103-140-35-14
$487.20 MSRP: $680.00You Save: $192.80 (29%)Ships in 1-2 Business DaysMercedes-Benz 190E Manifold Part Number: 102-140-00-09
Mercedes-Benz 190E Manifold Part Number: 102-140-39-09
Mercedes-Benz 190E Exhaust Manifold
Every OEM part goes through strict quality checks. The checks keep you safe and make Exhaust Manifold tough. They keep performance the same as your original parts. If your Mercedes-Benz 190E needs OEM parts, visit our catalog. You will find extensive genuine Mercedes-Benz 190E parts. We offer a wide selection at competitive prices, and with clear fit details and simple guidance, choosing what you need is effortless. Each of our parts has a manufacturer's warranty. You will like our simple return policy. We pack and ship fast, and you get your order quickly. Shopping here feels easy and enjoyable.
Mercedes-Benz 190E Exhaust Manifold Parts and Q&A
- Q: How to remove and refit the exhaust manifold on Mercedes-Benz 190E?A:To take out the exhaust manifold, first jack up front of the car and place it on axle stands. The second step involves loosening the U-bolt nuts connecting the exhaust downpipe(s) to the transmission-mounted support bracket and then unscrewing the bolts connecting the support bracket to the transmission and relocating the support bracket out of the way. On 6-cylinder models (petrol engines) unbolt and remove the heat shield on the underside of the manifolds. Put the exhaust downpipe(s) onto trolley jack, then loosen the bolts holding the downpipe(s) and remove them. Reduce the jack to separate the downpipe/manifold joint(s) and re-take the gaskets. When needed take off the air cleaner to gain access. Next loosen and loosen the nuts that hold the exhaust manifold to the cylinder head, and, where necessary, unscrew the upper end of the dipstick tube in a power engine, taking note of the location of the holding clip. To change models that use air injection, unbolt the air injection nozzle off the exhaust manifold and set the air pipe aside. Unbolt the EGA valve and recirculation pipes used in exhaust manifold on models that have exhaust gas recirculation. Lastly, remove the manifold(s) mounted on the cylinder head studs and reclaim the gasket, remembering that on six-cylinder engine models, the exhaust manifold is divided into two castings, and must be disconnected by loosening the connecting pipe clips parting the two pieces as you go. In refitting, reverse the actions of removal, but care should be taken to clean the mating surfaces of the manifold(s) and the cylinder head without gouging or scoring. In 6-cylinder petrol engines with gaskets textured with beads, the beads side of the gaskets should fit on the manifold-mating face, and occasionally the gasket on cylinder No 6 is hole-applied. New manifold securing nuts should be used always.


